Tank vs. Tankless Water Heater Care and Lifespans
When considering the heart of our home’s hot water supply, the choice between a tank-style and a tankless water heater significantly impacts maintenance needs and overall lifespan. Both systems, while serving the same purpose, operate on fundamentally different principles, leading to distinct care requirements.
Comparing Tank-Style and Tankless Systems
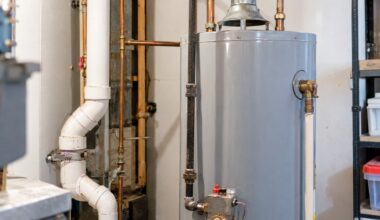
Tank-style water heaters rely on storage tanks, continuously heating a reservoir of water to a set temperature. This design, while familiar, means they are subject to “standby loss” – energy expended to keep water hot even when not in use. Their operational demands often lead to a typical lifespan of around 10 years. Maintenance primarily focuses on managing sediment accumulation within the tank.
Tankless water heaters, on the other hand, provide on-demand heating. Water is heated only as it flows through the unit, eliminating standby loss and often resulting in greater energy efficiency. This design, with fewer components susceptible to constant thermal cycling, contributes to a significantly longer lifespan, often reaching 20 years. However, their intricate heat exchangers are more vulnerable to mineral accumulation, demanding a different maintenance approach.
Here’s a quick comparison:
Sediment Flushing and Descaling Procedures
For tank-style water heaters, annual flushing is paramount. Sediment, primarily calcium carbonate from hard water, settles at the bottom of the tank. This sediment acts as an insulator, forcing the heating element or burner to work harder, reducing efficiency, and accelerating corrosion. Research indicates that sediment-filled tanks corrode 2–3 times faster than properly maintained ones.
The step-by-step process for flushing a tank-style water heater safely involves:
- Turn off Power/Gas: For electric units, switch off the circuit breaker. For gas units, turn the gas valve to the “off” position.
- Turn off Cold Water Inlet: Locate the cold water shut-off valve at the top of the water heater and turn it off.
- Attach Hose: Connect a garden hose to the drain valve located at the bottom of the tank.
- Open Drain Valve: Place the other end of the hose in a floor drain or outside, then open the drain valve.
- Release Vacuum: Open a hot water faucet in a nearby sink or tub to help the tank drain faster by breaking the vacuum.
- Flush Until Clear: Allow the tank to drain completely. Once empty, briefly open the cold water inlet valve to flush out any remaining sediment until the water running through the hose is clear.
- Refill and Restart: Close the drain valve, remove the hose, and close the hot water faucet. Open the cold water inlet valve and allow the tank to fill completely before turning the power or gas back on.
For tankless water heaters, the primary maintenance task is descaling the heat exchanger. Hard water minerals can build up inside the narrow passages, restricting flow and reducing heat transfer efficiency. This typically involves circulating a descaling solution, often vinegar, through the unit using a submersible pump and hoses. This procedure should also be performed annually, especially in areas with hard water, to prevent costly damage to the heat exchanger.
Key Safety Components: TPR Valves, Anode Rods, and Temperature Control
Beyond flushing and descaling, several critical components ensure the safety and longevity of our water heating systems. These elements manage pressure, prevent corrosion, and regulate water temperature, safeguarding both the equipment and our household.
Temperature and Pressure Relief Valve Inspection
The Temperature and Pressure Relief (TPR) valve is a crucial safety device designed to prevent catastrophic failure of a water heater. It automatically opens to release water if either the temperature or pressure inside the tank exceeds safe limits, preventing an explosion due to excessive pressure buildup.
We should test the TPR valve monthly to ensure it’s functioning correctly. To do this:
- Locate: Find the TPR valve, usually on the top or side of the water heater, with a discharge pipe leading downwards.
- Test: Place a bucket under the discharge pipe. Gently lift the lever on the TPR valve for a few seconds. Water should flow out of the discharge pipe, then stop when the lever is released.
- Observe: If water continues to flow or if no water comes out, the valve may be faulty and needs replacement.
This simple test is critical for safety verification. A malfunctioning TPR valve can lead to dangerous pressure buildup, potentially causing the tank to rupture. If the valve does not operate correctly, it must be replaced by a qualified professional.
Sacrificial Anode Rod Replacement
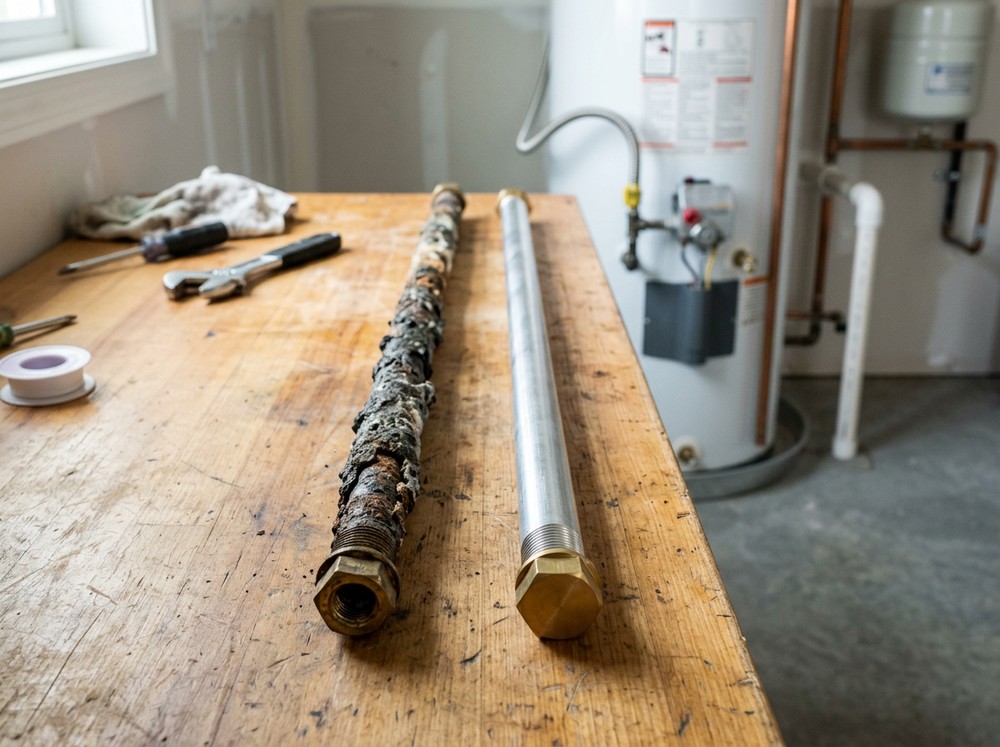
The anode rod is the unsung hero of a tank-style water heater, combating galvanic corrosion. Made typically of magnesium or aluminum, this “sacrificial” rod attracts corrosive elements in the water, corroding itself instead of the steel tank lining. Without a functioning anode rod, the tank’s interior would quickly rust through, leading to leaks and premature failure.
We should inspect the anode rod annually. To do this, we’ll need to shut off the water supply, drain some water from the tank, and then carefully unscrew the rod from the top of the heater. We should replace the anode rod if:
- More than 6 inches of the core wire is exposed.
- It is heavily corroded or significantly thinner than its original diameter.
Replacing the anode rod every three to five years, or sooner depending on water quality, can extend the tank’s life by 3–5 years, making it a highly cost-effective maintenance task for long-term tank protection and rust prevention.
Balancing Thermostat Settings for Safety and Bacteria Prevention
Setting the optimal water temperature is a delicate balancing act between energy savings, scalding prevention, and bacteria control.
- Energy Savings and Scalding Prevention: Most experts recommend setting the water heater thermostat to 120°F (49°C). This temperature is generally considered hot enough for household needs, significantly reduces the risk of scalding (water at 120°F takes over 5 minutes to cause a severe burn, compared to 1.5 seconds at 150°F), and can save energy.
- Bacteria Control: However, a temperature of 135°F to 140°F (57°C to 60°C) is more effective at preventing the growth of harmful bacteria, such as Legionella, which can thrive in lukewarm water. If we opt for a higher tank temperature for bacterial control, it is crucial to install anti-scald devices, also known as thermostatic mixing valves, at faucets and showers. These devices mix cold water with the hot water from the tank, ensuring the water delivered to the tap is at a safe temperature (e.g., 120°F) to prevent scalding, while still allowing the tank to inhibit bacterial growth.
Central Heating System Protection: Sludge, Scale, and Efficiency
Our central heating systems, particularly hydronic (water-based) ones, are complex networks vital for maintaining comfortable indoor temperatures. Ensuring their longevity and efficient heat distribution is as crucial as maintaining our water heaters. For comprehensive care of both residential and commercial heating systems, understanding the common threats like sludge, scale, and microbial contamination is key.
Combating Sludge, Scale, and Microbial Fouling
The efficiency and lifespan of our central heating systems are constantly threatened by internal contaminants:
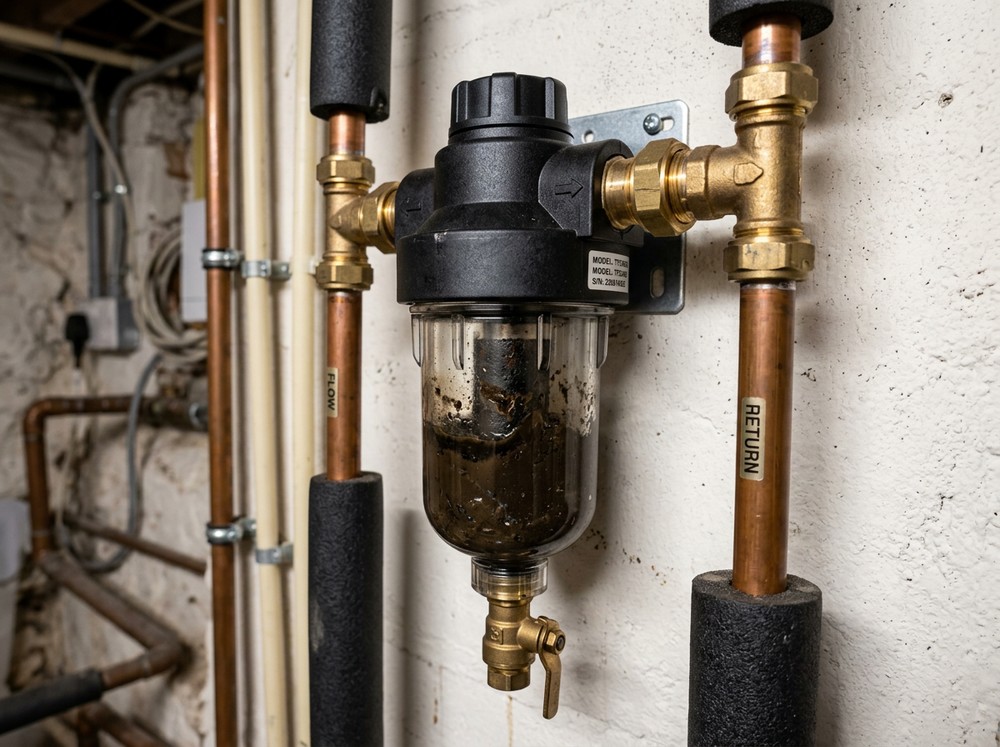
- Sludge: Often referred to as magnetite sludge or black iron oxide, this is a common byproduct of corrosion within the system. It accumulates in radiators, pipes, and boiler heat exchangers, causing cold spots in radiators, reducing heat transfer, and potentially blocking circulator pumps. Research highlights that sludge is the most common cause of failure for water-carrying components in heating systems.
- Scale: Limescale deposits, particularly prevalent in hard water areas, form on hot surfaces like boiler heat exchangers. This mineral buildup reduces the efficiency of heat transfer, leading to higher energy consumption and characteristic “kettling” noises as water struggles to heat.
- Microbial Contamination: In systems operating below 60°C, bacterial growth can occur, leading to blockages, foul odors, and corrosion. This is a particular concern in modern, lower-temperature heating systems.
These contaminants not only reduce the system’s efficiency but also increase wear and tear on components, leading to premature failures.
System Flushing, In-Line Filters, and Chemical Inhibitors
Addressing these issues requires a multi-pronged approach:
- System Flushing: For heavily fouled systems, a professional powerflushing service is often recommended. This involves circulating a high-velocity cleaning solution through the system to dislodge and remove sludge, scale, and debris. For less severe cases, a mains-pressure or gravity clean might suffice. The British Standard BS 7593:2019 provides comprehensive guidelines for preparing, commissioning, cleaning, and treating domestic heating and cooling water systems.
- In-Line Filters: Installing a magnetic filter (e.g., a central heating magnetic system filter) can effectively capture circulating iron oxide sludge, preventing it from accumulating in radiators and the boiler. These filters require regular cleaning as part of routine maintenance.
- Chemical Inhibitors: After cleaning, the system water should be treated with appropriate chemical inhibitors. These chemicals prevent future corrosion and scale formation. Biocides may also be added to control microbial growth, especially in systems prone to contamination. Annual dosing of these inhibitors is a best practice to maintain system passivation and protection.
Insulating Tanks and Pipework for Maximum Thermal Efficiency
Insulating our water heater tank and heating pipes is a simple yet highly effective way to improve energy efficiency and reduce utility bills.
- Water Heater Tank Insulation: A well-insulated tank reduces standby heat loss. Wrapping an older tank (one with an R-value less than R-24) with an insulation blanket (ideally with an R-value of 11 or higher) can reduce heat loss by 25-45%. This translates to significant energy savings, potentially lowering energy bills by 16-45% annually. Newer, more efficient tanks may not require additional insulation, but checking the manufacturer’s recommendations is always wise.
- Pipe Insulation: Insulating hot water pipes, especially those running through unconditioned spaces like basements, crawl spaces, or garages, prevents heat from escaping before the water reaches its destination. This reduces the amount of energy needed to heat water and can also provide freeze protection in colder climates. Pipe lagging, available in foam or fiberglass, is easy to install and offers immediate returns on investment.
Best Practices for Heating and Water System Maintenance Schedules
Establishing and adhering to a maintenance schedule is fundamental to ensuring the operational reliability and longevity of our heating and water systems. This involves a mix of straightforward DIY tasks and comprehensive professional inspections.
DIY Heating and Water System Maintenance Tasks
Many routine maintenance tasks can be safely performed by homeowners, contributing significantly to system health and preventative servicing. We should equip ourselves with basic tools and materials, such as a garden hose, adjustable wrench, and pipe insulation.
Here’s a list of essential DIY tasks and their recommended frequency:
- Monthly:
- Visual Inspection: Check for any visible leaks around the water heater, boiler, and pipes. Look for corrosion, drips, or puddles.
- TPR Valve Test: Briefly test the water heater’s Temperature and Pressure Relief valve (as detailed above) to ensure it’s not stuck.
- Annually (or Bi-Annually):
- Water Heater Flush: Flush the tank-style water heater to remove sediment (as detailed above).
- Tankless Descaling: Descale the tankless water heater’s heat exchanger.
- Temperature Adjustment: Verify the water heater’s thermostat setting (e.g., 120°F) for safety and efficiency.
- Pipe Insulation Check: Inspect pipe insulation and add or replace it where needed, especially in unconditioned spaces.
- Drainage Clearance: Ensure the area around the water heater and boiler is clear of obstructions and flammable materials.
- Radiator Bleeding (Central Heating): Bleed radiators to release trapped air, improving heat distribution.
Professional Heating and Water System Maintenance and Inspection
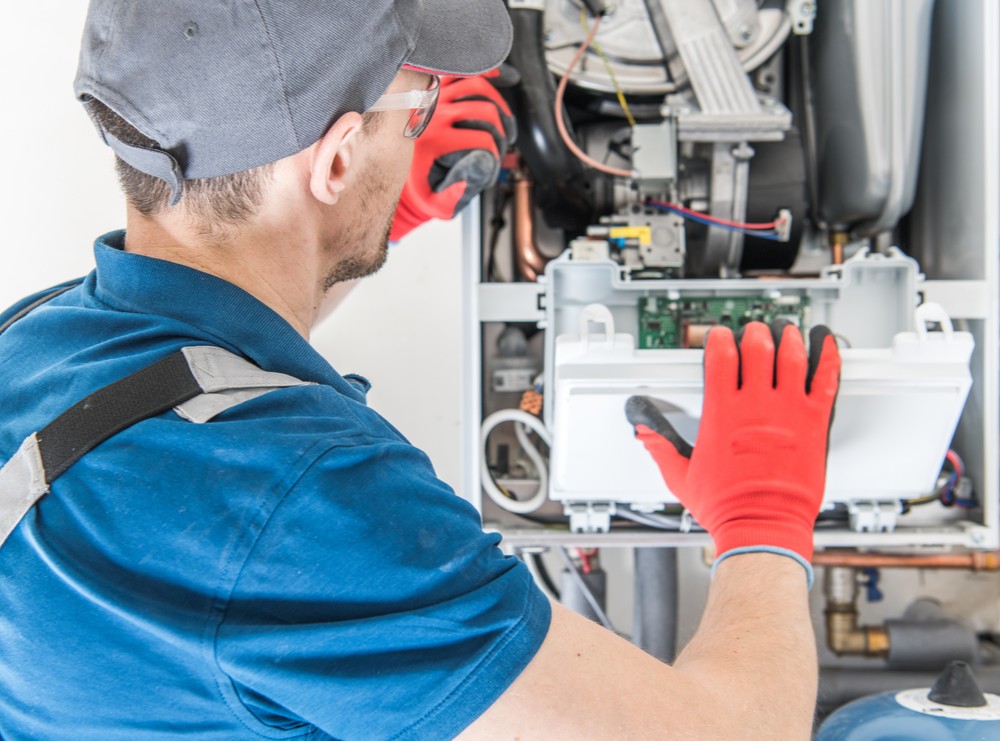
While DIY tasks are important, professional inspections are indispensable. A qualified technician can perform in-depth diagnostics and maintenance that require specialized tools and expertise. An annual tune-up for our water heater can extend its life by 3–5 years, and similar benefits apply to central heating systems.
Professional maintenance typically includes:
- Water Heater:
- Thorough inspection of all components, including heating elements, thermostats, and electrical connections (for electric units).
- Combustion analysis and gas pressure checks (for gas units).
- Inspection of the anode rod and replacement if necessary.
- Verification of flue drafting and vent integrity.
- Checking for gas line leaks.
- Central Heating System (Boiler/Furnace):
- Combustion analysis to ensure efficient and safe burning of fuel.
- Inspection and cleaning of the heat exchanger.
- Checking circulator pumps, expansion vessels, and safety controls.
- Testing and calibration of thermostats and zone valves.
- Flue gas analysis to ensure proper venting and minimize emissions.
- System water quality check and inhibitor dosing.
Professional service not only ensures optimal performance and early detection of potential issues but also helps maintain warranty compliance, as many manufacturers require documented annual maintenance.
Troubleshooting Common Warning Signs and When to Call a Professional
Early detection of problems can save us from costly repairs and unexpected breakdowns. Our heating and water systems often provide warning signs when something is amiss. Recognizing these physical symptoms and performance drops allows for timely intervention, whether through DIY fixes or professional assistance.
Diagnosing Discolored Water, Strange Noises, and Pressure Drops
- Discolored Water:
- Rusty Water: Often indicates a corroding anode rod or the tank itself. If the anode rod is depleted, the tank’s steel lining becomes exposed to corrosive elements in the water.
- White Plastic Particles: Can signal the deterioration of the dip tube inside a tank-style water heater, which directs cold water to the bottom of the tank.
- Brown/Green Water: May suggest corrosion in the plumbing pipes or a more severe internal issue within the water heater.
- Strange Noises:
- Popping or Rumbling Sounds (Water Heater): Typically caused by sediment buildup at the bottom of a tank-style water heater. The sediment traps water, which then boils and creates steam pockets that burst, causing the noise.
- Kettling Noise (Central Heating): A distinct boiling sound often indicates limescale buildup in the boiler’s heat exchanger, restricting water flow and causing localized overheating.
- Whistling or Gurgling (Pipes): Can indicate trapped air in the central heating system or issues with water pressure.
- Pressure Drops:
- Low Hot Water Pressure (Water Heater): Can be due to sediment buildup restricting flow, a failing dip tube, or issues with the home’s overall water pressure regulator.
- Low System Pressure (Central Heating): Often indicates a leak in the system or a faulty expansion vessel.
When faced with these issues, it’s wise to consult resources for water heater repair to accurately diagnose and address the problem. Some issues might be simple DIY fixes (like bleeding a radiator), while others require expert attention.
Cost Breakdown: DIY Upkeep vs. Licensed Plumber Service
Understanding the cost implications helps us decide when to tackle a task ourselves and when to call in a professional.
- DIY Upkeep Costs: Material costs for DIY maintenance are generally low, ranging from $20-$50 for items like a garden hose, pipe insulation, or a new anode rod. The primary “cost” here is our time and effort.
- Licensed Plumber Service Costs: Professional service fees vary but typically range from $150-$300 for a single visit, such as a water heater flush or a central heating system check-up. A full annual professional service, which might include multiple system checks, could cost $200-$600. Major repairs or replacements would, of course, incur higher costs for parts and labor.
While professional services have an upfront cost, they offer significant long-term ROI. A professional can identify nascent issues before they escalate into costly repairs, ensure warranty compliance, and optimize system efficiency, leading to lower energy bills. The preventative value of professional maintenance often far outweighs the initial expense, potentially saving us from catastrophic savings due to premature system failure or emergency repairs.
Frequently Asked Questions About System Care
Addressing some common questions can further empower us in our pursuit of optimal heating and water system maintenance.
How often should a residential water heater be flushed?
Most manufacturers and experts recommend flushing a tank-style residential water heater at least once a year. In areas with particularly hard water or high sediment content, flushing every six months might be beneficial. Regular flushing prevents sediment accumulation, which can degrade efficiency, reduce hot water flow, and significantly shorten the lifespan of the unit. For tankless units, an annual descaling of the heat exchanger is recommended.
What temperature setting best prevents Legionella without scalding?
To best prevent Legionella bacteria growth while minimizing scalding risk, we recommend setting the water heater tank temperature to 140°F (60°C). This temperature effectively inhibits bacterial proliferation. However, to ensure safety at the tap, especially in homes with children, the elderly, or individuals with disabilities, thermostatic mixing valves should be installed at hot water outlets (faucets, showers). These devices mix cold water with the hot water from the tank, delivering water at a safe 120°F (49°C) to the point of use, thus balancing bacterial inhibition with burn prevention.
Why is central heating sludge dangerous to boilers and radiators?
Central heating sludge, primarily magnetite (black iron oxide), is dangerous because it severely compromises the efficiency and integrity of the entire system. In boilers, it can cause localized overheating and blockages in the heat exchanger, leading to reduced efficiency and premature failure. In radiators, sludge settles at the bottom, creating cold spots and reducing the radiator’s ability to emit heat, forcing the boiler to work harder. It also puts strain on circulator pumps, leading to their early failure. Sludge buildup increases fuel consumption, reduces heating effectiveness, and shortens the lifespan of expensive system components.
Conclusion
Maintaining our heating and water systems is not merely a chore; it’s an investment in our home’s comfort, safety, and financial well-being. From the distinct needs of tank-style versus tankless water heaters to the critical safety checks of TPR valves and anode rods, and the essential fight against sludge in our central heating, proactive upkeep is key.
By understanding the recommended maintenance schedules, performing routine DIY tasks, and knowing when to engage a professional, we can significantly reduce utility costs, extend the lifespan of our equipment, and ensure the ongoing safety and performance of these vital household systems. In September 2026 and beyond, a well-maintained system is a hallmark of a well-cared-for home.