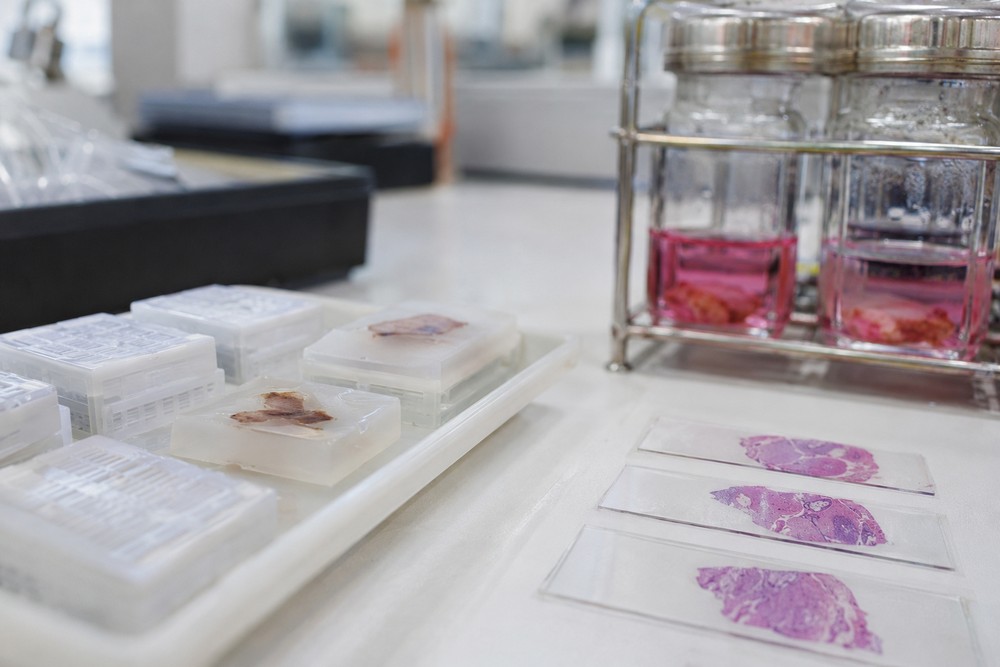
Most pathologists will tell you the same thing if you get them talking after a long shift: the block in their hand started as somebody’s worst Tuesday. A biopsy gets taken, a patient waits, and somewhere in between a wax block carries the whole answer. That block is an ffpe sample, and the trip it takes from procedure room to microscope slide is more fragile than most people outside the lab realize.
Here’s what this piece covers: the four stages every specimen passes through, the two points where quality quietly dies, and a short checklist you can run against any block before you trust what comes off it. I’ll also tell you which stage I’d watch hardest if I ran a lab, and it’s probably not the one you’d guess.
What Does FFPE Actually Stand For, and Why Does It Still Dominate?
Formalin-fixed, paraffin-embedded. Tissue gets soaked in formalin, which cross-links proteins and stops decay, then gets dehydrated through graded alcohols and finally infiltrated with melted wax so it can be sliced thin on a microtome. The whole point is stability. A well-made block can sit on a shelf at room temperature for years and still yield usable sections, which is why the format outlasted every attempt to replace it.
I’d argue the archive value is the real reason it survived. A fresh frozen aliquot is great until the freezer fails or the grant runs out. Wax doesn’t care. According to the National Institutes of Health, tissue repositories and biospecimen collections underpin a large share of translational research, and FFPE blocks are the backbone of those collections because they’re cheap to store and nearly indestructible in normal handling.
There’s a tradeoff, though, and it’s a big one. Formalin doesn’t just stop decay. It also chews up nucleic acids and snaps long RNA strands into fragments. A block made in 2009 isn’t a time capsule of pristine genetic material. It’s a partial record. That matters enormously depending on what you plan to pull out of it.
The Four Stages of the Journey
If you’re new to working with blocks, think of the process as a relay with four legs. Each one has a handoff, and handoffs are where things drop.
1. Collection and cold ischemia
The clock starts the moment the tissue loses its blood supply, not the moment it hits formalin. That gap is called cold ischemia time, and it’s the single most underappreciated variable in the entire workflow. Tissue sitting in a specimen container on a counter for a slow afternoon is already changing. Enzymes go to work. RNA degrades fast. Protein phosphorylation states drift. Nobody sees it happen.
2. Fixation
Ten percent neutral buffered formalin, typically for somewhere in the range of a day depending on thickness. Too little time and the center of the block stays raw, which ruins downstream staining and makes sectioning a nightmare. Too much time and the antigen masking gets heavy enough that some antibodies stop working entirely. The fix is genuinely a window, not a minimum.
3. Dehydration and clearing
Ethanol pulls the water out in steps. Xylene or a substitute clears the alcohol so wax can penetrate. Skip a step or rush the gradient and you get blocks that crumble on the blade or trap bubbles. This stage is boring, repetitive, and where I’d put my attention if I were auditing a lab. A processor that’s slightly off won’t announce itself. You find out three weeks later when sections keep tearing.
4. Embedding and sectioning
Tissue gets oriented in a cassette, wax poured, block cooled, and then sliced at a few microns thick. Orientation is quietly decisive. Bury a skin biopsy on its edge and your sections show mostly dermis, and no amount of skillful cutting gets that epidermis back.
Where Quality Actually Dies
Ask a lab tech which stage causes the most grief and you’ll hear about the same two culprits repeatedly.
- Cold ischemia, invisible at the time and irreversible afterward.
- Underfixation, which produces a block that looks fine on the outside and falls apart under the microscope.
The Centers for Disease Control and Prevention treats laboratory quality management as a discipline built around documented process control, and biospecimen handling fits that mold exactly. If nobody wrote down how long the specimen sat before fixation, you don’t have a block with a quality problem. You have a block with an unknown.
An undocumented block is a block you can’t defend. The record matters as much as the wax.
Reading the Block Before You Trust It
Here’s the practical part. Before you commit a research project to a set of blocks, run this check. It takes twenty minutes and saves months.
- Pull the paperwork first. You want fixation duration and time to fixation, not just a collection date. If those fields are blank, treat the block as unknown provenance.
- H&E stain one section per block. Look for nuclear detail. Fuzzy, washed-out nuclei with poor contrast usually mean the tissue was underfixed or overprocessed.
- Cut a test section and watch it float. Sections that shatter, ribbon poorly, or curl hard are telling you the wax infiltration was uneven.
- Check age against your assay. Immunohistochemistry on a decade-old block is often fine. RNA extraction from the same block may not be.
One thing I’d push back on: people assume older means worse. It doesn’t, reliably. A carefully fixed block from fifteen years ago can outperform a rushed one from last spring. Age is a weak predictor. Documentation is a strong one.
A Concrete Case Worth Studying
I once watched a team chase a staining inconsistency across eleven blocks before someone checked the processing log. Nine of the eleven had gone through the processor on a Friday. The fixative bath had been changed Thursday by a tech following a schedule nobody had updated after a shift change. Nothing was technically broken. Everything was technically compliant. And the result was a month of false leads chasing what looked like biology and was actually plumbing.
The lesson stuck with me. In specimen work, the interesting question is rarely “what does the tissue show?” It’s “what happened to this tissue before I saw it?” The National Institute of Standards and Technology documents reference materials and measurement traceability for exactly this reason. When the measurement system itself is shaky, additional data doesn’t rescue you. It buries the problem deeper.
Fresh Frozen or Wax: How to Choose
If your assay needs intact long RNA, whole-genome sequencing at high sensitivity, or live-cell follow-up, wax will let you down and you should plan for frozen from the start. If your work is histology, morphology, immunohistochemistry, or archival retrospective study, wax is the practical answer and usually the only one available.
My call: default to wax unless you have a specific molecular reason not to. It’s more forgiving, cheaper to keep, and far easier to ship. The failure mode of frozen is a broken freezer. The failure mode of wax is a sloppy fixation step, and sloppy fixation can be caught far earlier with a logbook and a habit of checking.
The Bottom Line
That block on your bench is a chain of decisions, and every link in it was made by a human being under time pressure. Collection, fixation, processing, embedding, sectioning. Four stages, two chronic failure points, one checklist that catches most of it. The tissue tells you what it is. The paperwork tells you whether you can believe it.
Pull five blocks from your next project and read their processing records against the checklist above. If any of them come back with empty fields, you’ve just found your real research question.