A whole-home painting project is easier to manage when every decision has a purpose. Whether the goal is to refresh worn walls, update an older style, brighten dark rooms, or prepare a property for sale, a room-by-room plan helps turn a broad idea into an organized project. Professional painting services can also help homeowners handle large projects, detailed preparation, or difficult surfaces without disrupting the entire home at once.
Start by considering how each space is used, how much light it receives, and which fixed features need to coordinate with the new color. That approach prevents common problems, such as choosing a beautiful sample that clashes with the flooring or selecting a finish that is difficult to maintain in a busy kitchen.
Why a Room-by-Room Painting Plan Works
Every room requires more paint in a different way. Bathrooms deal with humidity, hallways receive frequent contact, bedrooms should feel restful, and kitchens need surfaces that can be cleaned regularly. Planning by room lets homeowners match colors and finishes to those demands while creating smoother transitions between adjoining spaces.
Before buying paint, write down the rooms to be completed, the work each one needs, and a realistic budget for paint, primer, supplies, repairs, and labor. Separate cosmetic concerns from issues such as stains, damaged drywall, peeling paint, loose caulk, or moisture. Paint can improve a surface, but it should not be used to hide an unresolved problem.
Step 1: Set Goals and Study the Space
Choose the project priority first. A sale-preparation plan may favor broadly appealing, coordinated shades, while a long-term update can be more personal. Next, study the light. North-facing rooms can feel cooler, south-facing rooms often receive stronger light, and east- and west-facing rooms change noticeably through the day.
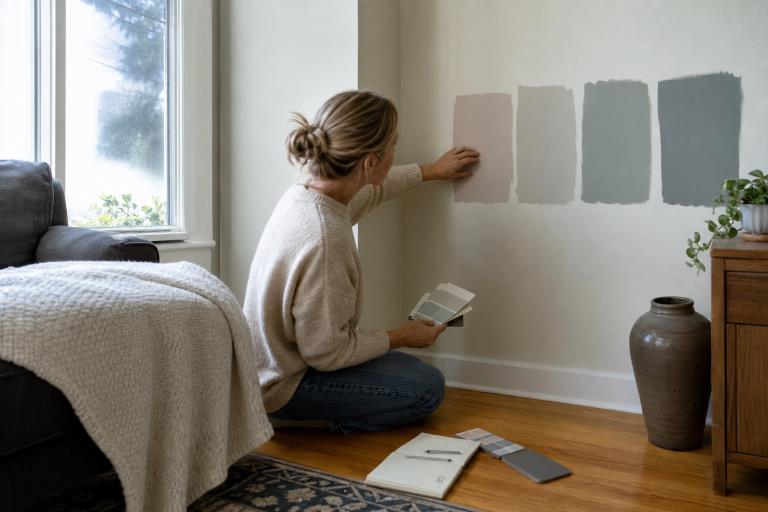
Review permanent features before choosing colors, including countertops, backsplashes, flooring, cabinets, fireplace surrounds, trim, and large furniture. Paint several sample areas rather than relying on a small card, then view them in morning, afternoon, and evening light. Undertones that are hard to see in a store can become obvious beside existing materials at home.
Step 2: Choose a Whole-Home Color Direction
Begin with a dependable base family for shared areas, hallways, and open connections. Warm whites, soft greiges, muted greens, gentle blues, earthy neutrals, and richer brown-based tones can all provide a flexible foundation. Then choose related lighter, darker, warmer, or cooler shades for individual rooms.
Deeper colors can add comfort and definition in dining rooms, offices, powder rooms, or bedrooms. Color drenching, where walls, trim, and sometimes the ceiling share a closely related shade, can create a cohesive effect in the right space. Use it carefully around ornate trim or strong architectural details so those features do not disappear.
Room-by-Room Paint Planning Guide
Living Rooms and Bedrooms
In living rooms, select a color that works with seating, rugs, flooring, window light, and the room’s view. Soft neutrals, muted greens, and gentle blues are adaptable choices. Bedrooms can support similar calm shades, or a deeper cocoon-like color when the room has enough light, and the homeowner wants a more enclosed feel.
Kitchens and Bathrooms
Kitchens require careful coordination with cabinets, counters, appliances, and backsplashes. Clean grease and residue thoroughly before painting, and choose a finish suited to routine cleaning. Bathrooms also need attention to ceilings, caulk, drywall, and ventilation. Pale neutrals, blue-green tones, and earthy shades can create a calm atmosphere, but any ongoing moisture issue should be corrected first.
Hallways, Staircases, and Home Offices
Hallways and staircases benefit from durable finishes because hands, bags, and daily traffic often mark these areas. Use their color to bridge neighboring rooms, especially in an open layout. For a home office, account for window glare, video-call backgrounds, shelving, and long work sessions. A restrained, deeper wall behind a desk can add structure without overwhelming the space.
Ceilings, Trim, Doors, and Cabinets
Classic white ceilings can brighten a room, but a softer off-white or a related wall color may better suit a warmer palette. Trim and doors usually benefit from a more durable sheen that provides definition. Cabinets and glossy previously painted surfaces require more preparation, including cleaning, sanding when appropriate, and a compatible primer.
How to Choose the Right Paint Finish
Understanding paint sheen helps homeowners balance appearance with maintenance. Lower-sheen finishes reflect less light and can make minor wall flaws less noticeable. Higher-sheen finishes reflect more light, are often easier to clean, and can reveal dents, sanding marks, or uneven repairs.
- Ceilings: Flat or matte helps reduce glare.
- Living rooms and bedrooms: Matte or eggshell offers a soft appearance with practical versatility.
- Kitchens and bathrooms: Eggshell or satin is commonly chosen for easier cleaning.
- Trim and doors: Satin or semi-gloss provides a more durable, defined finish.
Step 3: Prepare Surfaces and Plan the Work Order
- Remove dust, cobwebs, grease, loose paint, and residue.
- Fill nail holes, dents, and minor cracks, then sand repairs smooth.
- Replace failing caulk around trim, joints, and fixtures.
- Prime bare drywall, stains, patches, porous areas, and major color changes as needed.
- Protect floors, furniture, fixtures, and hardware before work begins.
- Complete ceilings first, then walls, trim, doors, and final touch-ups.
For homes built before 1978, disturbing old painted surfaces can create lead dust. The EPA explains that renovation work in older homes may require lead-safe practices, particularly when hiring paid professionals. Check applicable requirements before sanding, scraping, or starting extensive repairs.
DIY or Professional Help?
A careful homeowner may be comfortable painting a small bedroom or an uncomplicated accent wall. Professional help is often worthwhile for high ceilings, extensive repairs, cabinet refinishing, multiple occupied rooms, or projects with demanding preparation. Compare written estimates that identify surface prep, materials, number of coats, repairs, cleanup, and schedule. Ask about insurance, relevant licensing requirements, references, and recent comparable work.
Common Mistakes to Avoid
- Choosing paint from a screen or small chip without testing it at home.
- Using one finish throughout the house regardless of room function.
- Painting over peeling areas, stains, or moisture damage.
- Skipping primer where patches, bare surfaces, or stains need it.
- Forgetting to plan for ceilings, doors, trim, furniture storage, and drying time.
A Simple Painting Checklist
Inspect each room, establish a budget and schedule, select a connected color direction, test samples in changing light, choose finishes by room use, complete repairs, gather supplies, and plan the work in phases when necessary. Before moving furniture back, inspect every finished area in good light. Label and save leftover paint for future touch-ups.
Conclusion
A successful home painting project begins well before the first roller touches the wall. By planning around room function, light, finishes, preparation, and transitions, homeowners can create a home that feels coordinated, practical, and personal. A thoughtful 2026 plan also makes it easier to control costs and decide which parts of the work are best handled independently or by experienced painters.