Key Takeaways
- Plan electrical needs before demolition, framing, drywall, cabinets, and finishes are underway.
- New appliances, finished spaces, and equipment can require more circuits or service capacity than expected.
- Outlets, switches, lighting, safety devices, and future upgrades should be considered room by room.
- Permit and inspection rules vary by jurisdiction, so verify requirements before work begins.
A kitchen remodel, basement finish, or room addition can look straightforward until the new layout calls for appliances, lighting, and outlets the existing system was never designed to support. Before construction starts, homeowners who want a clearer picture of wiring routes, circuit needs, and installation options can visit this link to begin their early project research.
Electrical planning belongs near the beginning of design, not at the end. Wiring often runs behind walls, above ceilings, below floors, and inside areas later covered by cabinets or tile. Deciding where power is needed before finishes are installed helps prevent disruptive changes, avoidable labor, and delays later in the remodel.
Why Electrical Planning Should Start With the Design
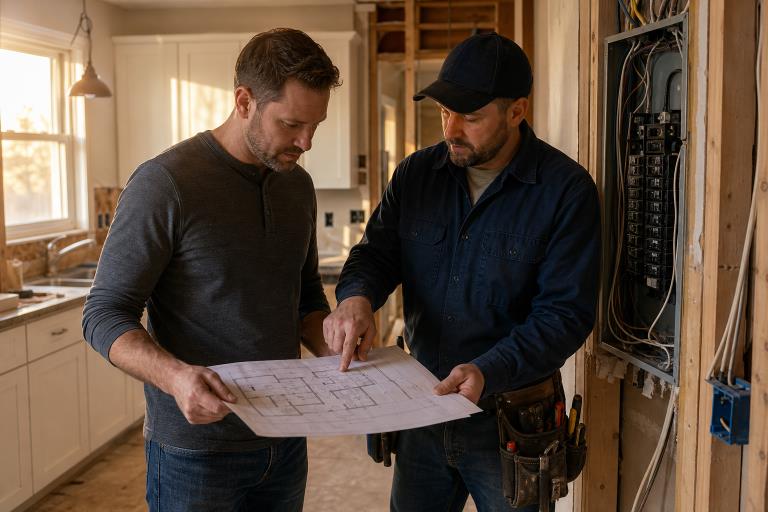
An early electrical plan coordinates the work of the homeowner, designer, builder, and electrician. It connects the floor plan to real daily use, including appliance locations, furniture placement, heating and cooling equipment, home office needs, outdoor features, and possible electric vehicle charging.
It also prevents a common mistake: focusing only on what is visible. A new kitchen may need under-cabinet lighting, island receptacles, separate appliance circuits, and well-placed switches. A finished basement may need power for a sump pump, media equipment, workstations, and future exercise equipment. Those details are much easier to address while the walls are open.
Make a Room-by-Room Electrical List
Walk through the existing home and proposed layout with a simple list. Include what you will use electricity for now, plus equipment that may be added within the next few years. Mark each item on a floor plan so the project team can identify practical outlet, switch, and wiring locations.
- List all planned appliances, fixtures, fans, and devices.
- Mark where furniture, counters, desks, televisions, and equipment will sit.
- Identify items that may need a dedicated circuit.
- Note locations where additional outlets would reduce reliance on extension cords.
- Flag future needs, such as an EV charger, heat pump, workshop equipment, or battery storage.
Review Electrical Capacity, Not Just Open Breaker Spaces
Adding a receptacle is different from increasing the home’s overall electrical demand. An electric range, dryer, water heater, heat pump, finished basement, or Level 2 charger can substantially change the load. An electrician should review the service size, panel condition, available breaker spaces, existing circuit loads, grounding and bonding, and the age and condition of wiring.
An open breaker space does not automatically mean the system has enough capacity for another major load. The panel, service equipment, and calculated demand all matter. Signs such as frequently tripped breakers, heat damage, corrosion, buzzing, or outdated wiring should be addressed before a remodel adds more demand.
Plan Dedicated Circuits for Major Equipment
Some appliances and systems are designed to operate on their own circuits. Dedicated circuits help avoid overloads and allow equipment to perform as intended. Review the manufacturer’s installation instructions before finalizing the plan, since voltage, amperage, disconnects, and circuit requirements vary by model.
- Electric ranges, ovens, cooktops, and wall ovens
- Dishwashers, disposals, and microwaves were required
- Clothes dryers and electric water heaters
- Heating, cooling, and heat pump equipment
- Workshop tools, refrigerators, freezers, and sump pumps
- Level 2 electric vehicle charging equipment
- Backup power systems and battery equipment
Put Outlets and Lighting Where They Will Be Useful
Minimum outlet requirements are only a starting point. Think about charging phones near beds, plugging in vacuums in hallways, powering a laptop at a desk, using small appliances on counters, and running holiday lighting outdoors. Consider floor outlets in open living areas, power inside a kitchen island, garage outlets for tools or refrigeration, and weather-protected exterior outlets where yard equipment will be used.
Lighting works best in layers. General lighting brightens the room, task lighting supports focused activities, and accent lighting adds visibility or atmosphere. Plan for under-cabinet kitchen lights, bathroom mirror lighting, stairways, closets, storage rooms, porches, walkways, garage benches, attics, and crawl spaces. Just as important, place switches along normal entry paths instead of behind doors or across the room.
Include Safety Devices and Local Code Requirements
Ground-fault and arc-fault protection target different hazards, while tamper-resistant receptacles, surge protection, smoke, carbon monoxide alarms, and accessible shutoff points enhance safety and convenience. The 2026 NEC updates offer context, but local codes and authorities decide what’s applicable to a remodel. Many electrical projects need permits, inspections, or both. Ask your local building department which permits, if an electrical diagram is required, who can perform the work, and inspection timelines. Keep approvals, panel schedules, manuals, and wiring photos as home records.
Prepare for Future Electrical Needs
A remodel is an ideal time to prepare for future systems, like vehicle charging, solar, or smart home controls, by planning conduit, panel space, and wiring routes. This can prevent costly wall openings later. The goal is to identify difficult areas and make practical provisions without overbuilding.
Questions To Ask Before Work Begins
- Which existing circuits will remain, and which will be replaced?
- Does the home have adequate service capacity for the remodel?
- Which appliances and systems need dedicated circuits?
- Will the main panel or subpanel need changes?
- Where will switches, outlets, junction boxes, and disconnects be located?
- Who is responsible for permits and scheduling inspections?
- What must be verified before drywall closes the walls?
- How will future equipment be supported?
A Simple Electrical Planning Timeline
- Before design: List appliances, fixtures, technology, and future power needs.
- During design: Mark outlets, switches, lighting, and equipment on the floor plan.
- Before demolition: Review the panel, service, wiring condition, and anticipated loads.
- Before rough-in: Confirm circuit assignments, equipment specifications, permits, and inspection timing.
- Before drywall: Verify box locations, photograph wiring routes, and complete required rough inspections.
- After installation: Test devices, complete final inspections, and save project documentation.
Conclusion
Electrical work should be part of the remodel design from the first planning meeting. A room-by-room list, realistic capacity review, thoughtful outlet and lighting layout, safety planning, and early permit check can reduce late changes and support the way the home will be used. With the electrical plan settled before construction begins, homeowners can create a safer, more functional space for both current routines and future upgrades.